
Design a Branding Iron That Marks Cleanly
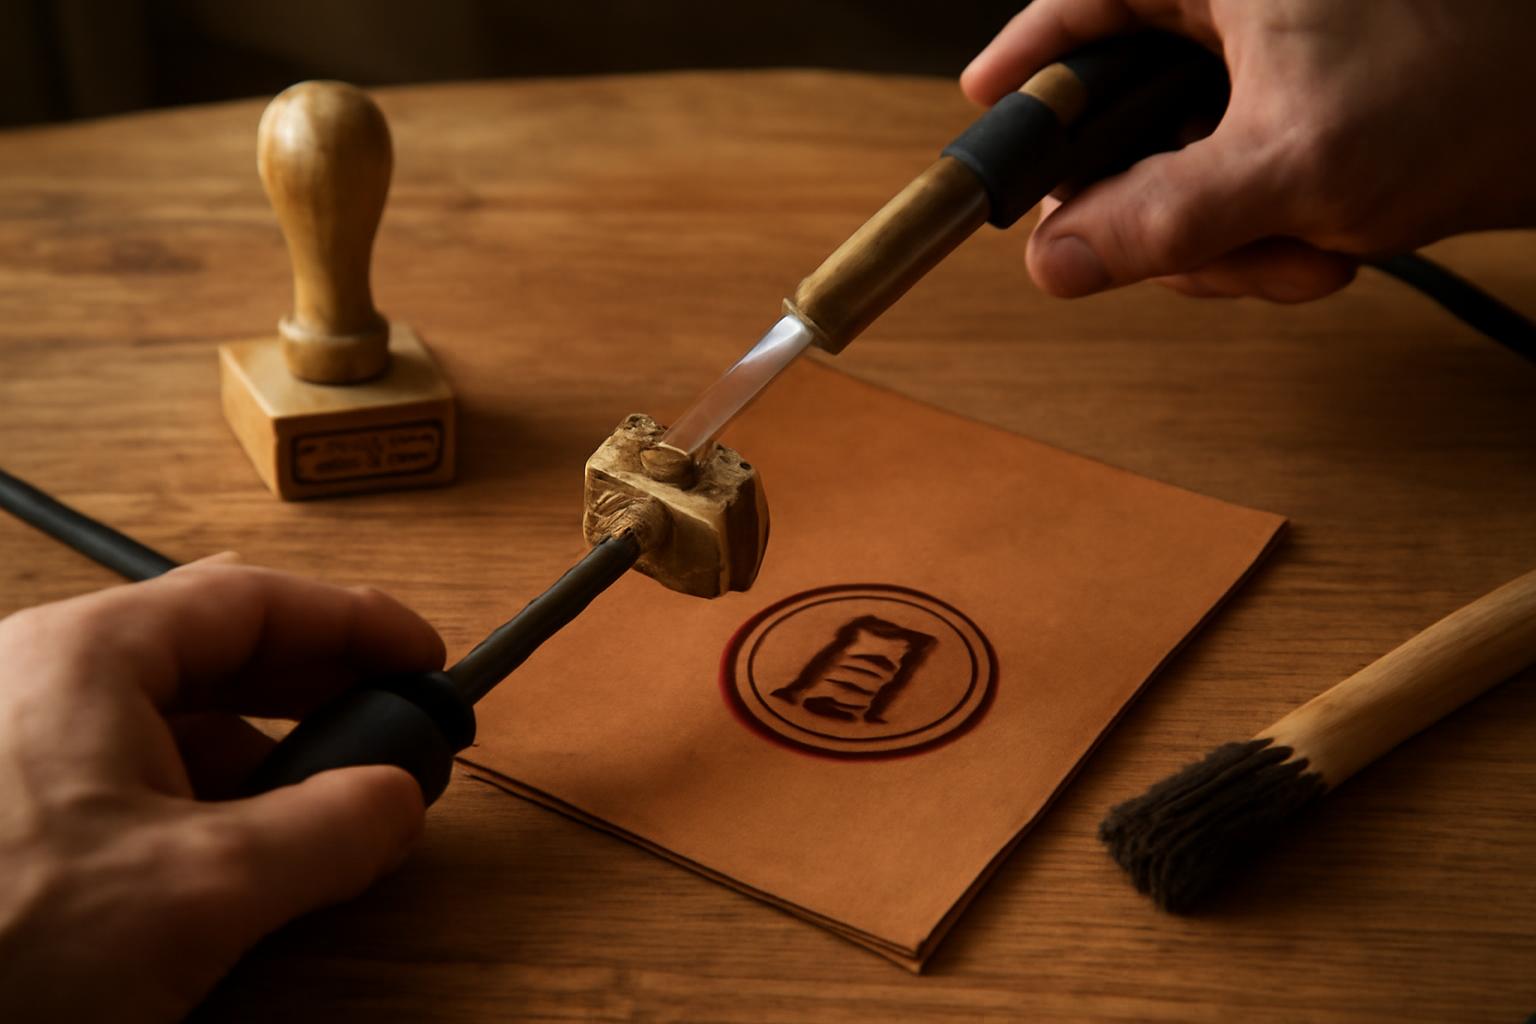
Electric heat removes the largest variable for indoor work or more than a handful of pieces a month. Compare torch heat, jigs and separate tags.
Overview
A personal branding iron is a heated metal tool that presses your logo, name, initials, or maker’s mark into wood, leather, and other suitable materials. Choosing well comes down to four decisions: the heating method (electric or torch), the size and detail of your artwork, the materials you brand most often, and how repeatable your results need to be. Testing on scrap before touching finished work is the single habit that separates clean marks from ruined pieces.
This guide is written for makers, woodworkers, leatherworkers, and small product sellers who want a durable mark on handmade goods, tags, plaques, or packaging. It covers craft and product use only — not livestock branding, which involves entirely different tools, regulations, and welfare considerations.
Most of the advice you will find online is fragmented: a DIY build log here, a single product demo there. This guide pulls the practical decisions into one place — how to pick a tool type, prepare your logo, match the iron to your material, build a repeatable workflow, troubleshoot bad burns, and keep the iron working for years.
What a personal branding iron is
A personal branding iron is a heated die — usually machined or cast metal — mounted on a handle or heating element, used to burn or emboss a personal mark into a receptive surface. The mark can be a logo, a signature, initials, a name, or any custom design that survives translation into raised metal. Heat transfers from the die face into the material, scorching wood, searing leather, or compressing softer stock into a permanent impression.
The key distinction from livestock branding irons is purpose and scale. Personal branding irons for craft use are small, precise, and designed for controlled marks on inanimate materials. This guide does not cover animal branding, which carries legal and animal-welfare implications outside the scope of maker workflows.
Personal branding iron vs custom branding iron
In craft contexts, the two terms overlap heavily, and vendors often use them interchangeably. “Custom branding iron” describes any iron made to order with a unique design — a shop logo, a product line mark, a family crest. “Personal branding iron” emphasizes the individual identity behind the mark: it is your signature on your work.
Practically, almost every personal branding iron is a custom branding iron, because the die must be fabricated from your artwork. The distinction matters mostly when searching for vendors: guides like Gearheart Industry’s complete guide to custom branding irons cover the same tool category across wood, leather, and food applications. Treat the terms as one category and focus on the specifications instead.
Common uses for makers and small product workflows
Makers reach for a personal branding iron whenever a printed label or sticker would feel out of place on handmade work. The most common applications cluster around a few surfaces and contexts:
- Wood projects: cutting boards, furniture, boxes, turned pieces, and shop plaques
- Leather goods: wallets, belts, straps, and bags, where the brand doubles as a maker’s mark
- Tags and plaques: separate branded pieces attached to finished work
- Packaging and cork: kraft boxes, cork stoppers, and display materials, with careful heat control
- Occasional food use: some custom irons are ordered for marking baked goods or buns, though mixed-use tools raise sanitation questions covered later in this guide
Not every material takes a brand equally well, and thin, glossy, or synthetic surfaces often behave unpredictably. The material sections below cover where extra caution pays off.
Choosing the right personal branding iron
The choice of iron type is the decision with the longest consequences, because it locks in your heating workflow, your consistency ceiling, and how much technique you must supply yourself. The main options are electric irons, torch-heated irons, press-mounted or guided setups, interchangeable-head systems, custom-machined heads, and full DIY builds.
Consider a worked example. A leatherworker sells roughly 20 vegetable-tanned wallets a month and wants a 25 mm logo brand on each interior. Her constraints: an indoor studio with no open-flame tolerance, a logo with medium detail, and a need for near-identical marks across every wallet. Working through the logic: indoor use rules out torch heating; repeated identical marks favor consistent heat, which is the documented strength of electric irons per Ferrum Branding’s leather branding guide; and 20 pieces a month justifies a simple placement jig rather than freehand pressing. The outcome: an electric iron with a custom-machined head, plus a corner jig to register each wallet — not the cheapest option, but the one that matches her material, volume, and workspace. If she instead branded five rustic wooden crates a year in an outdoor shop, a torch-heated iron would have been entirely defensible.
The table below summarizes how the main options compare so you can run the same logic on your own inputs.
| Type | Best for | Consistency | Setup effort | Skill level | Main caution |
|---|---|---|---|---|---|
| Electric | Repeated marks, indoor studios, leather and wood | High — steady heat | Moderate (warmup, stand) | Beginner-friendly | Still needs test burns per material |
| Torch-heated | Occasional use, outdoor or well-ventilated shops | Variable — manual heat judgment | Low tooling, high technique | Intermediate | Overheating and open flame |
| Press-mounted / guided | Production runs, thin stock, precise placement | Highest alignment | Highest (jig or press build) | Beginner once built | Upfront fixture work |
| Interchangeable-head | Multiple marks or sizes on one handle | Depends on heat source | Moderate | Beginner–intermediate | Thread wear over time |
| Custom-machined | Brand-critical logos, fine-ish detail | High die quality | Order lead time | Any | Cost scales with size and detail |
| DIY-fabricated | Simple marks, experimentation | Lowest — geometry can drift | High fabrication effort | Advanced | Warping and durability |
No single row wins outright; the right answer depends on your material, volume, workspace, and how much the mark’s consistency matters to your brand.
Electric branding irons
Electric irons plug in, heat to a working temperature, and hold it — which is why they are the default recommendation for repeated use. Ferrum Branding’s guide notes that electric branding irons offer consistent heat and control, which directly reduces the two most common failure modes: pale marks from an under-heated die and scorched marks from an overheated one.
Consistency is relative, not absolute. Warmup time, die mass, and how quickly the head recovers heat between impressions all vary by tool, so an electric iron still requires test burns on each new material. But if you brand more than a handful of pieces a month, or work indoors, electric heating removes the largest variable from the process.
Torch-heated branding irons
Torch-heated irons are simple: a metal head, a handle, and a propane torch or similar flame source. Their appeal is low tool complexity and no cord — useful in outdoor shops or for occasional marks. The tradeoff is that you become the thermostat. Judging when the head is hot enough, but not too hot, takes practice, and the head cools continuously once it leaves the flame.
DIY build logs like IBuildIt’s branding iron project show this workflow in action: heat, test on scrap wood, adjust, repeat. Expect your first several burns on any new material to be experiments. Torch heating is workable for rustic marks and forgiving woods, but it is the hardest route to identical impressions across a production run.
Press-mounted and guided setups
Freehand pressing is where most alignment failures happen — the iron slips, rocks, or lands crooked, and the piece is ruined. Woodworkers have long solved this with fixtures: Woodsmith’s branding iron guide describes a simple shop-built guide that holds a thin strip of wood in a slot so the brand lands in exactly the same spot every time, precisely because branding discrete spots freehand tends to slip or burn unevenly.
You do not need a commercial press to get this benefit. A common shop trick shared among woodworkers on Reddit is to take a metal pipe with an inside diameter slightly larger than the brand head, cut one end perfectly square, and use it as a drop-in sleeve that keeps the iron vertical and positioned. If you brand multiple identical pieces, some form of guide is usually worth building before your first production run.
DIY branding irons
Making your own iron is a legitimate project — build logs on Instructables and IBuildIt walk through routes ranging from CAD-designed stainless heads to hand-shaped and welded steel. The IBuildIt build also surfaces the honest constraints: the maker’s first decision was how big to make the letter, limited by the iron’s overall dimensions and what could be shaped by hand, and complex designs quickly push past what manual fabrication can deliver cleanly.
DIY suits simple marks — a single letter, initials, a basic shape — and makers who enjoy the fabrication itself. For a detailed logo that must look identical for years, custom machining or a commercial order is usually the more defensible choice, because hand-fabricated heads can be difficult to make crisp and may change subtly with repeated heating.
How to prepare your logo for a branding iron
Your artwork is as likely to cause a bad brand as your technique. A logo designed for a website carries fine strokes, small text, and tight spacing that raised metal under variable heat simply cannot reproduce. Preparing the design before you order or build saves you from discovering the problem on a finished piece.
The goal is a version of your mark that reads clearly at branding scale — often much smaller than you picture it — and that tolerates slight variations in heat and pressure without filling in or blurring.
Simplify detail before you order or build
Fine lines, micro-text, and small enclosed gaps are the first casualties of a heat process. When the die is slightly too hot, or you dwell slightly too long, heat bleeds outward from every edge; narrow gaps between strokes fill with char and merge into a blob. This is why experienced makers routinely produce muddy burns from intricate marks despite good equipment.
Work from your full logo toward a branding version: remove gradients and thin flourishes, thicken the strokes that remain, and drop any text smaller than the main mark. The DIY build logs make the same point from the fabrication side — IBuildIt’s project notes that letter size was constrained from the first decision, and complex designs may be better suited to CNC or commercial production than hand shaping. If your simplified mark no longer feels like your brand, simplify differently rather than shrinking detail back in.
Check size, spacing, and negative space
Before sending artwork to a fabricator, run it through a short production-readiness check:
- Size the mark to the smallest surface you will realistically brand, not the largest
- Confirm strokes are thick enough to survive slight heat bleed on your target material
- Keep clear space between strokes so adjacent lines cannot merge when hot
- Check enclosed counters (the holes in letters like “a” and “o”) are open enough not to fill in
- Verify the die face will sit flat on the actual branding location — curved or cramped spots defeat flat dies
A mark that passes all five checks on paper still needs a scrap test, but it will fail far less often. If any check fails, fix the artwork now; changing a machined die later means paying for fabrication twice.
Mirror the design when the method requires it
A branding die is a stamp: whatever is raised on the metal prints reversed on the work. Commercial fabricators normally handle this conversion for you, but you should confirm it explicitly in the order, especially for text and asymmetric logos. Nothing stings like a beautifully machined iron that brands your name backwards.
For DIY routes the risk is higher, because you are transferring the design to metal yourself. Whether you are printing a toner transfer, laying out a CAD file for a printed head, or scribing onto steel by hand, decide deliberately at the transfer step whether the artwork must be mirrored, and test-print the reversed version on paper first. One minute of checking orientation prevents the most demoralizing fabrication failure there is.
Material and surface considerations
The same iron at the same temperature behaves differently on every material it touches. Density, moisture, surface finish, and thickness all change how fast heat transfers and how the mark develops, so treat each new material — and often each new batch — as its own calibration exercise. Guides that cover multiple substrates, such as Gearheart Industry’s custom branding iron guide, exist precisely because wood, leather, and food each demand different handling.
The sections below describe the tendencies to expect. None of them replace a test burn on matching scrap, because exact temperatures and dwell times depend on your specific iron, die size, and stock.
Wood
Wood is the most common branding surface and also the most variable. Dense hardwoods take heat slowly and produce controlled marks; soft or resinous woods can flare and char around the impression. Grain direction, moisture content, and any existing finish all shift the result — a brand that looks perfect on dry maple scrap can halo badly on an oiled walnut board.
One practical moisture trick circulates among woodworkers: lightly misting the wood with water before branding can produce a sharper mark with less burn in the surrounding grain. Treat it as a variable to test rather than a rule, and always run your test burns on offcuts from the same board or batch as the finished piece, not on generic scrap.
Leather
Leather brands quickly and unforgivingly, so dwell times are short. Ferrum Branding’s leather guide recommends holding the heated iron on the leather for 2–5 seconds, using vegetable-tanned leather because it responds best to heat, and allowing the branded piece to cool for a few minutes before handling. Those three details — short dwell, veg-tan preference, and a cooling pause — cover most of what separates a crisp leather brand from a scorched one.
Chrome-tanned, oiled, or coated leathers respond less predictably, and moisture in the hide changes how deep the mark sets. As with wood, test on a scrap of the same hide, adjust one variable at a time, and let each test cool fully before judging it, because leather marks continue to darken slightly as they set.
Packaging, cork, paper, and soft materials
Low-mass materials heat through almost instantly, which compresses your margin for error to nearly nothing. Kraft board, paper tags, and thin cork can scorch, curl, or burn through with dwell times that would barely mark hardwood. Reduce heat where your tool allows it, lighten your pressure, and shorten contact to a quick, decisive touch.
Flexible materials add a mechanical problem: they deform under pressure, which distorts the impression. Support thin stock on a firm, flat backing, and consider a guide or sleeve so the iron cannot rock. For very thin strips, the fixture approach in Woodsmith’s guide — a slotted base that traps the strip while the brand comes down in a controlled path — is the reliable pattern to copy.
Food and mixed-use cautions
Custom branding irons are sometimes ordered for marking food, and multi-material guides like Gearheart Industry’s treat food as a distinct application alongside wood and leather. The critical caution is cross-use: an iron that has branded finished wood, leather dyes, or packaging carries residues you do not want transferred to food, even if the metal itself is a food-compatible alloy.
If food branding is part of your plan, dedicate a separate head — or a separate iron — to food use only, and confirm with your fabricator that the materials are appropriate for food contact rather than assuming it. This guide cannot verify formal food-safety compliance for any specific product, so treat vendor confirmation as a required step, not a formality.
A repeatable branding workflow
Consistency comes from process, not from the iron. Whether you brand one plaque a month or twenty wallets a week, running the same sequence every time is what makes the fiftieth mark look like the first. A workable baseline sequence looks like this:
- Set up a clear, heat-safe workspace with the iron on a stand and flammables moved away
- Heat the iron and confirm readiness with a test burn on matching scrap
- Adjust one variable at a time — heat, dwell, or pressure — until the test mark is right
- Register the workpiece against a guide, jig, or marked position
- Apply the brand with steady, even pressure and a deliberate dwell
- Let the piece cool before inspecting or handling the mark
- Log what worked: material, surface condition, dwell, and result
Each step exists because skipping it has a known failure mode: skipping the test burn ruins finished work, skipping registration produces crooked marks, and skipping the log means recalibrating from zero next month. The three subsections below expand the steps where most mistakes happen.
Test before the finished piece
Never let the finished piece be the first thing the hot iron touches. Test on scrap that matches the real work as closely as possible — same species, same hide, same batch, same surface prep — because the whole point of the test is to predict the real result. A test on the wrong material predicts nothing.
When a test mark disappoints, resist the urge to change everything at once. Adjust one variable — heat, dwell time, pressure, or surface prep — then test again. Changing two variables simultaneously means you cannot tell which one fixed (or worsened) the mark, and you will burn through scrap without learning anything.
Control placement with guides or jigs
Freehand pressing works for large, forgiving surfaces where a few millimeters of drift is invisible. It becomes risky on small pieces, discrete placements, and anything where the brand must sit square to an edge — exactly the situations Woodsmith’s guide describes when noting how hard it is to brand a discrete spot without the iron slipping or burning unevenly.
The fixes are cheap. The pipe-sleeve trick from r/woodworking — a squarely cut pipe just larger than the brand head, stood on the mark location — keeps the iron vertical and positioned. A plywood corner jig registers repeated pieces identically. A clamp keeps the workpiece from shifting mid-press. If you brand more than a few identical items, build the fixture before the run, not after the first ruined piece.
Brand directly or use a separate tag
Branding directly onto finished work is the classic approach, but it concentrates all the risk in one press: a bad burn on a completed piece can mean hours of rework or a scrapped product. The alternative is to brand a separate element — a thin wood strip, a small plaque, or a leather tag — and attach it afterward. Woodsmith’s strip-branding guide embodies this pattern: the brand goes onto a long, thin strip held in a fixture, and the branded strip is then applied to the project.
The tag approach has three advantages: you can brand a batch of tags in one controlled session, discard any misfires at trivial cost, and rework or replace the mark later without touching the piece. Direct branding still wins where the integrated look matters — a mark burned into the piece itself reads as more permanent and personal. A sensible split: brand directly on forgiving, high-volume items, and use tags or plaques on high-value or heavily finished work.
Troubleshooting common branding iron problems
Almost every bad brand traces back to one of three variables — heat, dwell time, or contact — interacting with the material and the artwork. Rather than trial-and-erroring your way through ruined scrap, diagnose from the symptom: what the failed mark looks like tells you which variable to suspect first. The three most common failures are marks that are too light, marks that are too dark, and edges that blur or land unevenly.
Whatever the symptom, make your correction on scrap, change one variable at a time, and let each test cool before judging it. Marks often deepen slightly as the material cools, so a hot inspection can mislead you into overcorrecting.
The mark is too light
A pale, shallow mark usually means not enough heat reached the material — either the iron was under temperature, the dwell was too short, or the die never made full contact. Check contact first: a slightly rocked iron or an unsupported workpiece can leave part of the die floating above the surface, producing a faint or partial impression. Material variation matters too; a dense or damp patch of wood absorbs heat differently from the scrap you calibrated on.
Increase dwell time in small increments before increasing heat, because dwell is easier to control and reverse. Cranking heat aggressively to fix a light mark is how light marks become scorched ones. For torch-heated irons, also consider that the head may be cooling too much between the flame and the workpiece — shorten that gap before blaming the material.
The mark is too dark or scorched
Char, halos, and blackened edges point to too much energy: an overheated die, an overlong dwell, or excessive pressure driving the hot face deep into the material. Torch-heated irons are especially prone to this, because there is no thermostat between you and the flame — the head can leave the torch far hotter than the material needs. Dry, resinous, or already-finished surfaces also scorch more readily than raw, slightly moist stock.
Cool the iron slightly and shorten the dwell, then retest. On wood, the light water-mist technique shared among woodworkers can sharpen the mark and reduce burn in the surrounding grain — worth testing if halos persist at your lowest workable heat. On leather, remember the short end of Ferrum Branding’s 2–5 second dwell guidance; leather punishes overlong contact quickly.
The edges are blurry or uneven
Blurry or smeared edges usually mean movement: the iron rocked, twisted, or slid during the press, or the workpiece shifted underneath it. Uneven impressions — dark on one side, faint on the other — mean the die face was not parallel to the surface. Both are placement problems more than heat problems, and both respond to the fixtures described earlier: a pipe sleeve, a slotted guide, or a clamp that immobilizes the work.
Two other culprits are worth checking. Carbon buildup on the die softens the raised edges and prints as fuzz, so inspect and clean the face if crispness has degraded over time. And artwork that is too fine for the process will read as blurry no matter how steady your hand is — if only the smallest details smear while bold strokes print cleanly, the fix is design simplification, not technique.
Safety, cooling, and maintenance
A branding iron spends its working life at wood-scorching temperatures, and it looks exactly the same hot as it does cold. That combination — high heat, no visual warning — is why safety here is about workspace discipline rather than warnings printed on the handle. The same discipline extends to how you cool, clean, and store the tool, because neglect shows up later as degraded marks and unexpected failures.
Set up the safety side once, as part of your standard workflow, and it stops costing attention: a designated stand, a clear zone, and a cooling routine you follow every session.
Heat and fire safety
Start with staging. Ferrum Branding’s process guide opens with workspace preparation — a clean, uncluttered bench and the iron resting on a heat-safe stand — and that order is deliberate: most accidents happen when a hot iron is set down somewhere improvised. Keep sawdust, finish rags, solvents, and paper out of the branding zone, since a workshop’s most flammable materials tend to accumulate exactly where branding happens.
Torch-heated irons add open-flame considerations: work with real ventilation, keep the torch pointed away from anything combustible, and never leave a lit torch unattended while positioning the workpiece. After the last press, park the iron on its stand in a marked spot and treat it as hot until proven otherwise — metal holds dangerous heat long after it stops visibly marking material. Let branded pieces cool before handling as well; leather in particular needs a few minutes before the mark is set and safe to touch.
Cleaning and storage
Every burn deposits a little carbon on the die face, and accumulated buildup rounds off the crisp edges your mark depends on. Clean the face regularly once the iron is fully cool, using a method gentle enough not to scratch or deform the raised design — the die’s geometry is the brand, and abrasive cleaning slowly erases it.
Storage is about preserving that geometry between sessions. Keep the iron dry to prevent rust on the face, protect the handle from impacts, and store it where the die cannot get dinged against other tools. Periodically inspect the parts that degrade quietly: threaded connections on interchangeable-head systems loosen and wear, welded joints on DIY builds can fatigue, and repeatedly heated heads — especially hand-fabricated ones — can warp enough to change how flat the face sits. A quick flatness check on scrap at the start of each session catches drift before it ruins finished work.
Buying, ordering, or making your own
The buy-versus-make decision comes down to what the mark is worth to you. If the brand is part of your product identity — something customers will see on every piece for years — consistency and die quality dominate the decision. If the mark is personal and occasional, the calculus loosens considerably, and a simpler or homemade tool may serve fine.
This guide deliberately avoids quoting current prices, because vendor pricing changes and the supplied evidence does not support reliable ranges. What it can do is explain what drives cost and where each route makes sense, so you can evaluate real quotes when you get them.
What affects cost
Custom iron pricing scales with the work required to make your specific die and the hardware around it. The main drivers are:
- Die size — larger faces mean more material and machining time
- Detail level — fine or dense artwork requires more precise fabrication
- Die material — harder, longer-wearing alloys cost more to machine
- Heating method — electric elements and temperature control add over a plain torch-heated head
- Interchangeable heads — modular systems cost more upfront but let one handle serve multiple marks
- Turnaround — rush fabrication typically carries a premium
When comparing quotes, compare like for like: the same artwork at the same size, in the same material, with the same heating method. A cheaper quote for a smaller or simplified die is not actually cheaper — it is a different product. Request current pricing directly from fabricators rather than relying on figures found in older articles or videos.
When DIY is worth considering
DIY makes sense when the mark is simple, the stakes are low, and the fabrication is part of the appeal. Build logs on Instructables and IBuildIt show that a competent home shop can produce a working iron for a single letter or basic shape — and that the process itself teaches you a great deal about heat, dwell, and material behavior.
The honest limits appear in the same build logs: size and detail are constrained by what you can shape or weld by hand, complex designs push toward CNC or commercial production, and homemade heads can drift in geometry with repeated heating cycles. Factor in your time and tooling, and DIY is rarely the cheap option it first appears for brand-critical work. A reasonable rule: build your own to experiment and learn; order machined when the mark represents your business.
Final checklist before your first real brand
By this point you have chosen a tool type, prepared your artwork, and tested on scrap. Before the iron touches finished work, run one last verification pass:
- Artwork confirmed: simplified for branding scale, orientation checked so it prints correctly
- Material matched: test burns done on scrap from the same batch, not generic offcuts
- Settings dialed: heat, dwell, and pressure produced a clean mark on the last two consecutive tests
- Placement controlled: guide, sleeve, jig, or clear registration marks in place; workpiece secured
- Direct-vs-tag decision made: high-value or finished pieces considered for a branded plaque or tag instead
- Safety staged: heat-safe stand ready, flammables cleared, ventilation adequate for your heat source
- Cooling planned: a safe spot for the hot iron and a hands-off period for the branded piece
If every line checks out, press with confidence — steady contact, deliberate dwell, straight lift. And log the result while it is fresh: material, surface condition, settings, and how the mark looks after cooling. That log is what turns your first good brand into a repeatable one.